Introduction
In this tutorial we are going to install and configure Traefik Proxy. As quoted on their website "Traefik is a leading modern reverse proxy and load balancer that makes deploying microservices easy. Traefik integrates with your existing infrastructure components and configures itself automatically and dynamically." All our applications will be front-ended by traefik.
Objective
The core objective for this tutorial is to:
Topology
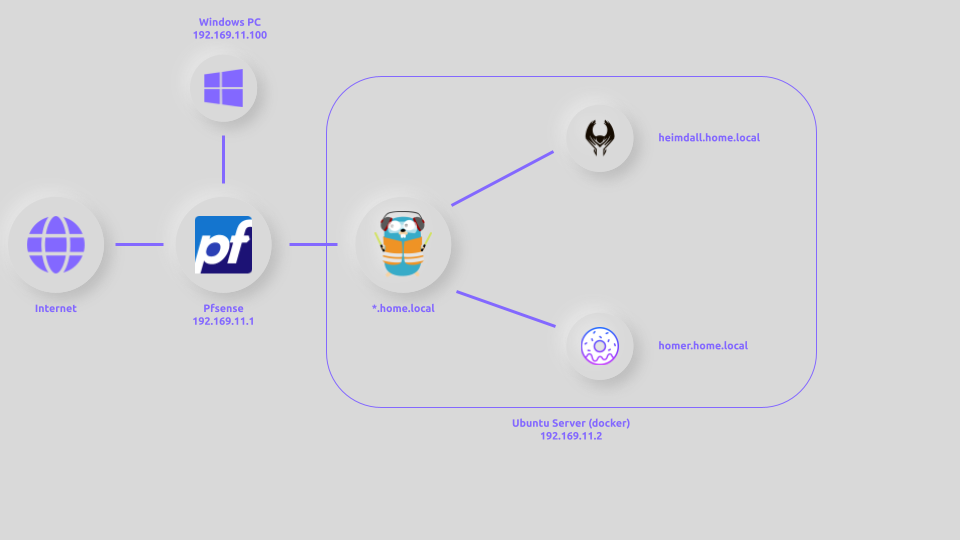
- Windows PC - This PC is used to install and configure traefik and for testing
- Ubuntu server - This PC runs docker and will host traefik and our applications
Following is what we are trying to achieve:
- From the windows PC we will open a browser and navigate to http://homer.home.local and http://heimdall.home.local
- Since pfsense is our DNS server, the URL's will resolve to the ubuntu server's IP address and traefik will pick up the request as we will expose port 80 on the container
- Traefik will then route the request to the appropriate container
- If all goes well we should see the homer and heimdall pages load on our Windows PC browser
Assumptions
- A DNS server that can be configured with an A record to point to a traefik proxy. We will be using the pfsense firewall
- An installation of docker and docker-compose. We will be running docker on Ubuntu 20.04.3
DNS Configuration
The goal is to access our application using freindly URL names as opposed to IP's and port numbers. In order to do so we need to identify a domain name. We are going to choose home.local as our domain name. This domain is used internally within our network and will not exist on the Internet. We need our DNS server to resolve *.home.local to our Ubuntu server. So homer.home.local and heimdall.home.local will both resolve to our Ubuntu server IP address 192.168.11.2.
In pfsense navigate to:
- Services --> DNS Resolver --> General Settings
- Enable DNS Resolver
- Scroll down and Display Customer Options and past the following config
 server:
 local-zone: "home.local" redirect
local-data: "home.local 3600 IN A 192.168.11.2" ping home.local
PING home.local (192.168.11.2) 56(84) bytes of data.
64 bytes from pserver (192.168.11.2): icmp_seq=1 ttl=64 time=0.032 ms
64 bytes from pserver (192.168.11.2): icmp_seq=2 ttl=64 time=0.089 ms
64 bytes from pserver (192.168.11.2): icmp_seq=3 ttl=64 time=0.109 msConfigure and Install Traefik
Create a directory to store the docker files and traefik config files
 mkdir traefik
 cd traefik
Create a docker-compose.yml file using an editor of your choice
vim docker-compose.ymlPaste the following config in docker-compose.yml
version: "3.3"
services:
  traefik:
    container_name: traefik
    image: traefik:2.3 # Download traefik v2.3
    restart: always # Restart the container if stops
    ports:
      - 80:80 # Expose port 80 on the host machine
    volumes:
      - ./static_config.yml:/etc/traefik/traefik.yml # Traefik's static config file
      - /var/run/docker.sock:/var/run/docker.sock # Allow Traefik access to docker API's to dynamically learn applications
    labels:
      # Traefil uses lables to learn about containers and dynamically configures itself. Expose the traefik dashboard on port 80
      - traefik.http.routers.traefik-http.rule=Host(`dashboard.home.local`)
      - traefik.http.routers.traefik-http.entrypoints=web
      - traefik.http.routers.traefik-http.service=api@internal
    # Use the customer network web that is defined below
    networks:
      - web
networks:
  web:
Create a traefik static file using an editor of your choice
vim static_config.ymlPaste the following config in static_config.yml
 log:
  level: DEBUG # Enable logging
api:
  dashboard: true # Enable the traefik dashboard
entryPoints:
  web:
    address: ":80" # Define the name called web and expose port 80
providers:
  docker: {} # Tells traefik to monitor docker for changes and autoconfigure
Start Traefik
docker-compose up -d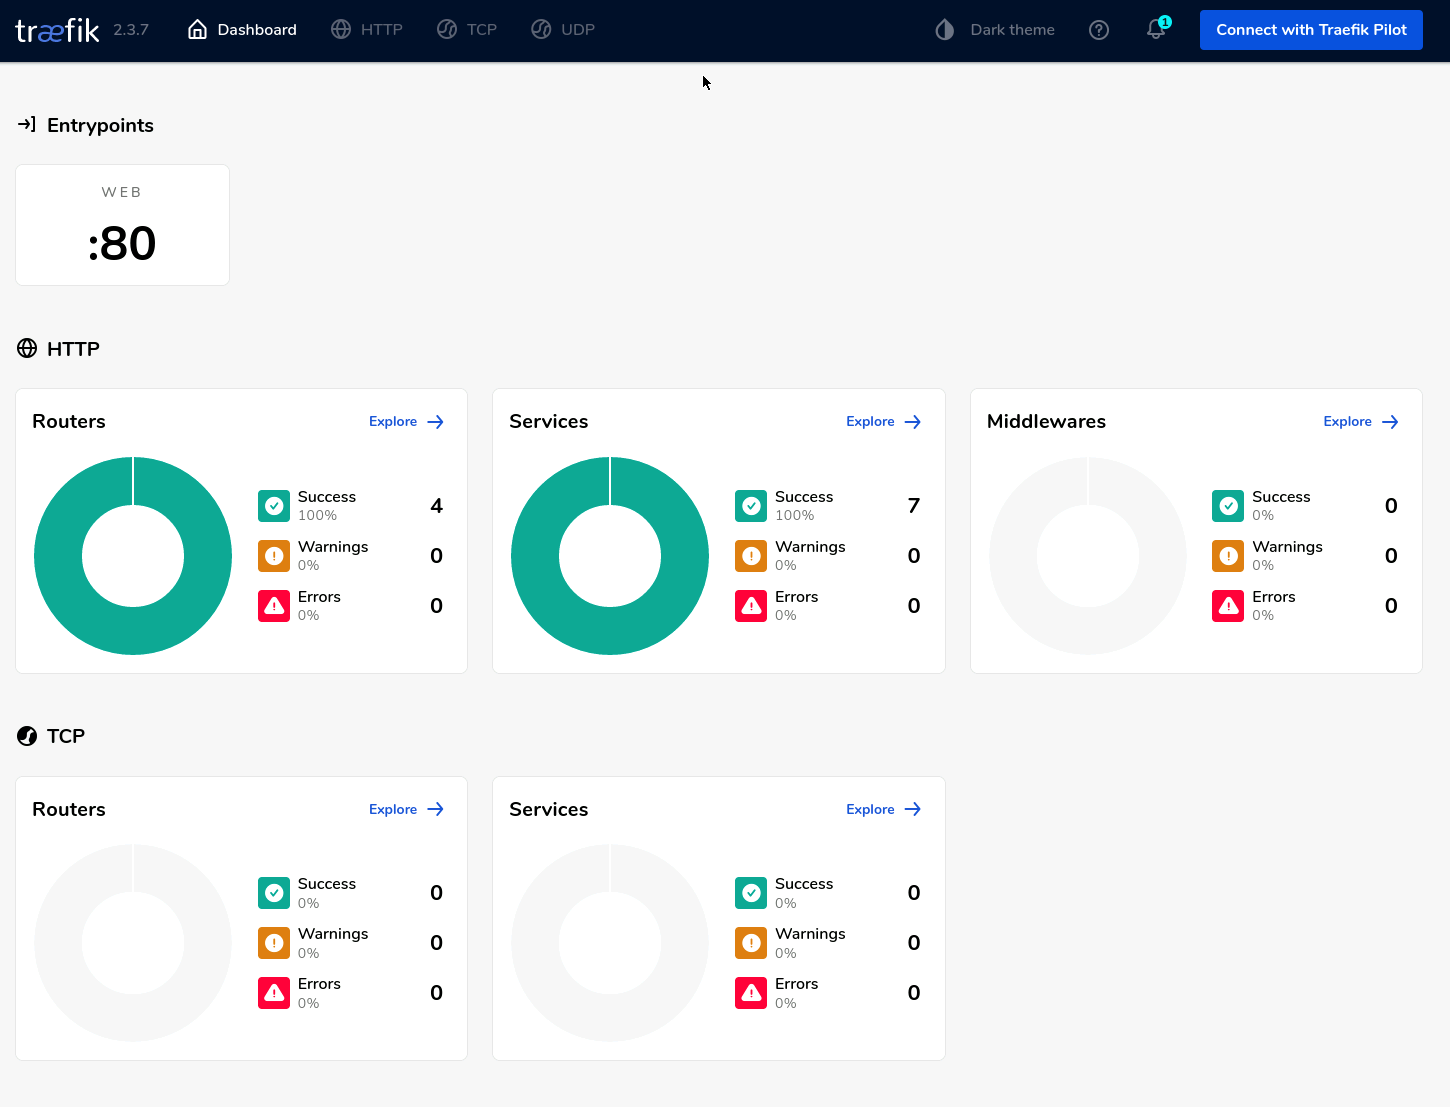
Configure and Install Homer
Create a folder called homer your home path
 mkdir homer
 cd homer
Create a docker-compose.yml file using an editor of your choice
vim docker-compose.ymlPaste the following config in docker-compose.yml
version: "3.5"

services:
  homer:
    image: b4bz/homer
    container_name: homer
    volumes:
      - ./assets/:/www/assets
    ports:
      - 8080:8080
    restart: unless-stopped
    labels: # auto-detects port 80 in next line
      traefik.http.routers.homer.rule: Host(`homer.home.local`)
    networks:
      - traefik_web
networks:
  traefik_web:
    external: true
Start Homer
docker-compose up -d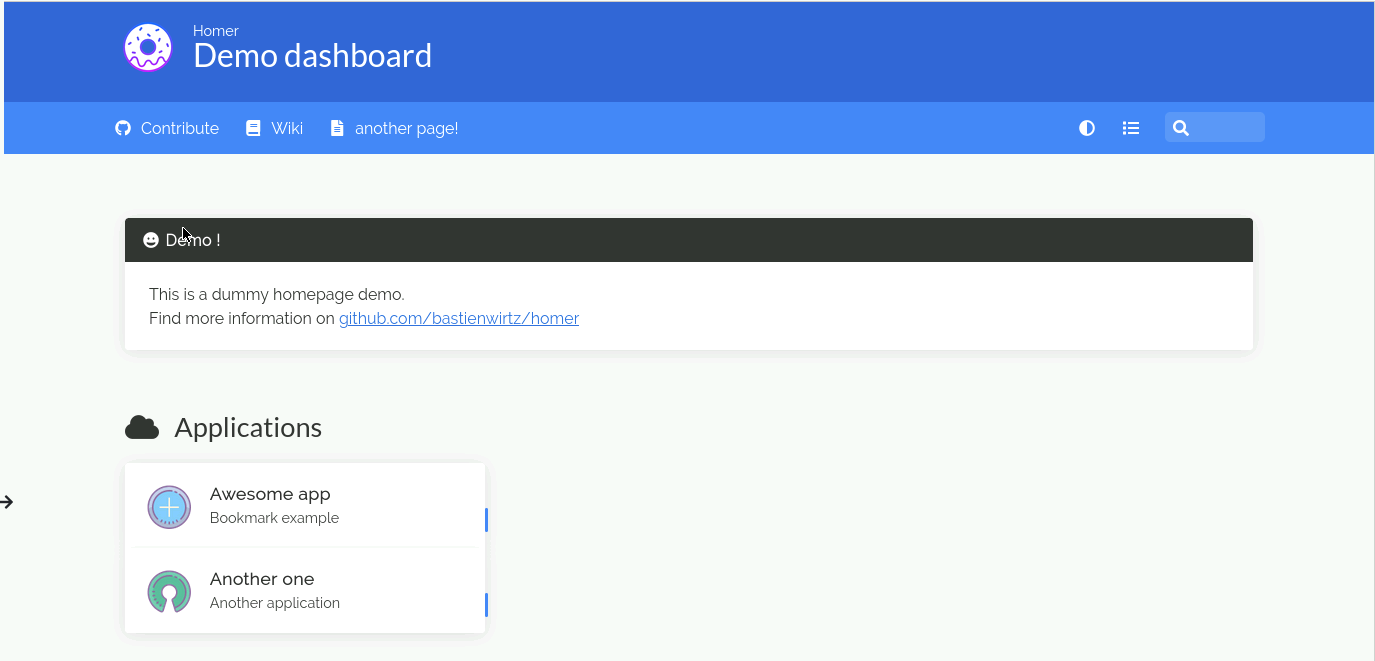
Configure and Install Heimdall
Create a folder called homer your home path
 mkdir heimdall
 cd heimdall
Create a docker-compose.yml file using an editor of your choice
vim docker-compose.ymlPaste the following config in docker-compose.yml
version: "2.1"
services:
  heimdall:
    image: lscr.io/linuxserver/heimdall
    container_name: heimdall
    volumes:
      - ./config:/config
    ports:
      - 8081:80
    restart: unless-stopped
    labels: # auto-detects port 80 in next line
      traefik.http.routers.heimdall.rule: Host(`heimdall.home.local`)
    networks:
      - traefik_web
networks:
  traefik_web:
    external: true
Start Heimdall
docker-compose up -d
Conclusion
We installed the traefik reverse proxy and setup a DNS server to direct all requests to a domain (home.local) to the reverse proxy. We also installed two applications (homer and heimdall) that are accessible via the reverse proxy. Everything was installed in docker and traefik can automatically learn about the application to self-configure itself to route traffic to the appropriate application. In the next part we will configure traefik to route traffic to an external application (non-docker application), enable HTTPS and secure HTTP applications with HTTPS
References
- Traefik Documentation - Has some good quick start information
- Homer
- Heimdall
Comments
Post a Comment